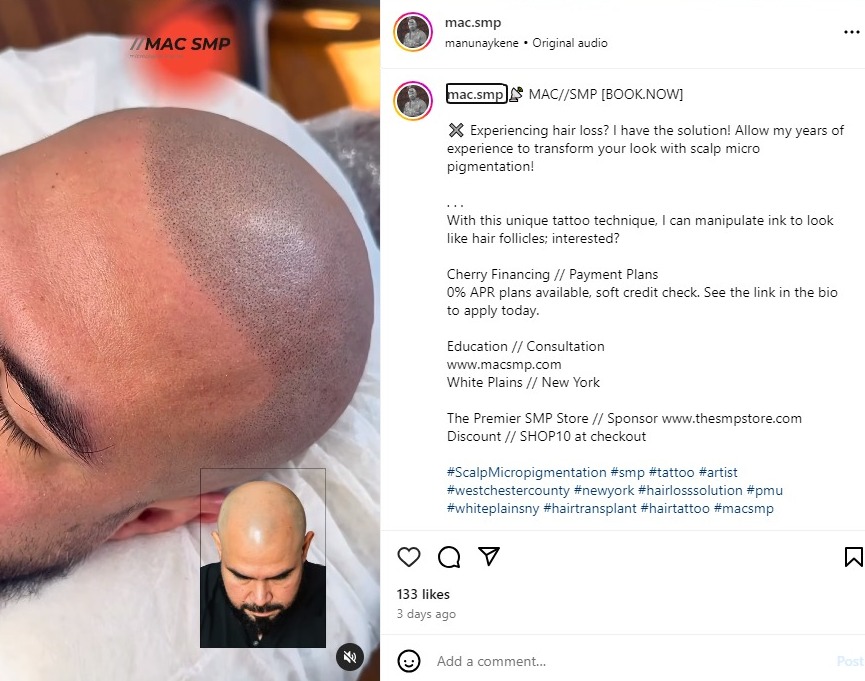
Scalp micropigmentation (SMP) is a popular pattern baldness or thinning hair loss solution that involves tattooing tiny dots of pigment onto the scalp to create the appearance of a full head of hair. Unlike hair transplants, the SMP procedure is a non-surgical one, that has become increasingly popular in recent years due to its effectiveness in creating a natural-looking hairline and providing the illusion of fuller hair.
However, choosing the right practitioner for your scalp micropigmentation procedure is crucial. Not all practitioners are created equal, and you want to ensure that you’re entrusting your scalp and hair to someone qualified and experienced. In this post, we’ll outline the factors to consider when choosing an SMP practitioner and give tips for researching potential practitioners and finding the right one for your specific needs.
Table of Contents
Key Takeaway
Choosing the right practitioner for your scalp micropigmentation procedure is crucial. It’s important to take the time to research potential practitioners, look at before-and-after photos, ask for references and speak with past clients, and schedule a consultation. Considering the factors outlined in this post will help you ensure that you’re entrusting your scalp and hair to someone who is qualified and experienced.
Remember, SMP is a non-surgical procedure designed to give you the appearance of a full head of hair. Thus, taking your time with an SMP procedure with the first practitioner you find is essential. Take the time to research and find the right practitioner for you and your specific needs to ensure the best results.
Scalp Micropigmentation: Navigating Risks and Benefits for Informed Decisions
Are you considering scalp micropigmentation as a solution for hair loss? It’s crucial to weigh the potential benefits against the associated risks. While it offers a non-surgical approach compared to traditional hair transplant surgery, understanding both sides of the coin can help you make an informed decision.
Advantages of SMP:
- Non-invasive bliss: Unlike hair transplants, SMP requires no incisions or sutures, minimizing discomfort and scarring.
- Pain-free progress: This procedure typically utilizes numbing cream, reducing discomfort and anxiety during the process.
- Wallet-friendly solution: Compared to hair transplant surgery, SMP generally carries a lower price tag, making it a more accessible option for many.
- Downtime? Downsized: Forget weeks of recovery! SMP allows you to resume your daily routine almost immediately after the procedure.
Potential Risks and Complications:
- The unlicensed gamble: Choosing an inexperienced or unlicensed practitioner significantly increases the risk of complications.
- Allergic alarm bells: Although rare, allergies to the pigment used in SMP can occur. Discussing your allergy history with the technician is vital.
- Infection concerns: Unsanitary practices and unsterilized needles can lead to infections, highlighting the importance of choosing a reputable practitioner.
- Appearance apprehension: While skilled technicians strive for natural-looking results, there’s a chance the outcome may not meet your expectations.
Minimizing Risks:
- Seek a licensed technician: Opt for practitioners certified by reputable organizations like the Society of Permanent Cosmetic Professionals (SPCP).
- Review their portfolio: Request to see before-and-after photos of their work to assess their skill and aesthetic approach.
- Disclose allergies: Inform your technician of any allergies to ensure proper pigment selection and testing.
Weighing the potential benefits against any possible drawbacks and ensuring you choose a qualified practitioner empowers you to decide whether SMP aligns with your individual needs and aesthetic goals.
Factors to Consider When Choosing an SMP Practitioner
When it comes to SMP, you want to ensure that you’re in the hands of an adequately trained and experienced practitioner. The following factors are important to consider when choosing an SMP practitioner:
● Training and experience:
It’s essential to find a practitioner who has been properly trained and has a good amount of experience performing SMP procedures. Look for practitioners trained by reputable organizations with a proven track record of successful procedures.
● Use of high-quality equipment and pigments:
The quality of the equipment and micro pigments used in an SMP procedure can significantly affect the end result. Make sure to choose a practitioner who uses high-quality equipment and dyes specifically designed for SMP procedures.
● Positive customer reviews and testimonials:
Look for practitioners who have positive reviews and testimonials from satisfied customers. This is a good indication that the practitioner is reputable and that their clients are happy with the results of their SMP procedure.
● Ability to customize treatment to individual needs:
Each person’s hair loss and scalp are unique, so it’s important to find a practitioner who can customize the smp treatment to your specific needs. This will ensure you get the best results from your SMP procedure.

How to Research Potential SMP Practitioners
Once you’ve identified a few potential SMP practitioners, you must do your research to ensure that they’re the right fit for you. Here are some tips for researching potential practitioners:
● Check for certifications and credentials:
Make sure that the practitioner is certified and credentialed by a reputable organization. This is a good indication that they’ve been adequately trained and qualified to perform SMP procedures.
● Look at the before-and-after photos:
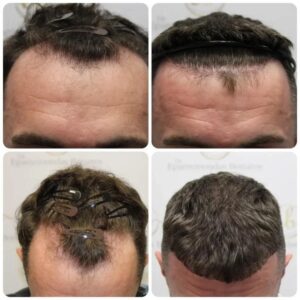
Look at before and after photos of the practitioner’s past SMP procedures. This will give you an idea of their skill level and the results you can expect from your own SMP procedure.
● Ask for references and speak with past clients:
Don’t be afraid to ask the practitioner for references and speak with past clients. This will give you a sense of what it’s like to work with the practitioner and what you can expect from your SMP procedure.
● Schedule a consultation:
Schedule a consultation with the practitioner to discuss your hair loss and scalp micropigmentation procedure goals. This will give you a chance to ask questions, get to know the practitioner, and ensure that you’re comfortable with their level of expertise.
Choosing the Right Practitioner for Your Specific Needs
SMP practitioners come in many different varieties, and it’s crucial to find one that specializes in the specific technique you want. Here are some considerations for different hair types and skin tones:
● Different types of SMP practitioners:
Some practitioners are specifically trained in medical hair tattoo, while others specialize in hair restoration. It’s crucial to find a practitioner who specializes in the specific technique you want, whether scalp micropigmentation, hairline tattooing, or something else.
● Considerations for different hair types and skin tones:
The color and texture of your hair and skin can affect the results of your SMP procedure. Make sure to choose a practitioner with experience working with clients with hair and skin types similar to yours.
● Importance of finding a practitioner who specializes in the specific technique you want:
Different SMP techniques have different results, so make sure to find a practitioner who specializes in the specific technique you want. This will ensure you get the best results from your SMP procedure.
SMP Procedure Step by Step: A Detailed Guide to Regaining Confidence
The procedure is done in stages, and each step plays a vital role in achieving the desired results. Here is a step-by-step guide to the SMP procedure.
1. Consultation: Setting Realistic Expectations and Planning Your Transformation
Your journey begins with a consultation with a qualified and experienced practitioner. During this initial meeting, they’ll assess your hair loss pattern and scalp condition and, most importantly, understand your goals for the procedure. Remember, achieving a movie star hairline might not be realistic, so honesty about your expectations is key. S
ome practitioners utilize digital tools to visualize potential results, helping you understand the possibilities and personalize the design you envision. Different techniques exist, like follicular replication and density shading, and the practitioner will recommend the best option based on your needs and desired outcome. This is also your chance to clarify any doubts about the procedure, the practitioner’s qualifications, and the overall process.
Consider factors like cost, number of sessions (usually 2-4), and recovery time to ensure a smooth and informed journey.
2. Pre-Procedure Preparation: Getting Ready for Micro Magic
Before embarking on your transformation, specific preparation steps are crucial for optimal results. Certain medications, particularly blood thinners, may need to be stopped several days before the procedure (typically 7 days).
Discuss this with your doctor and the practitioner to ensure safety. Sun exposure on the treatment area should be minimized for a specified period before the procedure to optimize pigment retention. Imagine building a sandcastle; wouldn’t you want the foundation to be dry and ready for the building blocks? The practitioner will either provide or instruct you on using a numbing cream to reduce discomfort during the procedure.
Sometimes, an allergy test for the pigment might be recommended to ensure your safety and peace of mind.
3. The Procedure: Bringing Your Design to Life
Now comes the exciting part – the actual procedure! This is typically broken down into three key steps:
- Design and Mapping:
Imagine your new hairline as a masterpiece taking shape. The practitioner uses a special pen to meticulously design your new hairline, considering factors like shape, density, and how it will seamlessly blend with your remaining natural hair. This is like sketching the first outlines of your masterpiece.
To ensure precise pigment placement, they create a map of the treatment area using various techniques like a grid system or freehand design. Think of this as meticulously planning the color blocks on your canvas before applying the paint.
- Pigment Application:
This is where your new hair follicles come to life! The pigment is applied using specialized machines or needles (e.g., single needles, micropigmentation machines) chosen for precision and comfort. Each dot of pigment is carefully placed within the mapped area, mimicking the appearance of natural hair follicles.
Just like an artist carefully chooses the right brush and paint, the practitioner selects the ideal tools to create a natural-looking result. Careful color matching of the pigment to your natural hair ensures a seamless blend, eliminating any telltale signs of the procedure.
In some cases, multiple passes might be needed to achieve optimal density and depth of pigmentation, similar to an artist layering paint to achieve the desired effect.
- Initial Healing and Touch-up:
Remember, even masterpieces need time to settle. The initial healing process typically takes 2-4 weeks. After this period, a touch-up session addresses any pigment settling and adjusts density for a perfect look. Think of this as the final brushstrokes and touch-ups that take your masterpiece to the next level.
4. Post-Procedure Care: Nurturing Your New Look
Just like any masterpiece needs care to maintain its beauty, your new hair follicles require proper aftercare for optimal results. Consistent sun protection with SPF is crucial for long-term pigment retention. Remember, the sun can fade even the most vibrant colors! Avoid harsh chemicals and exfoliants in hair products as they can affect the pigmentation.
Think of them as harsh winds and rain that could damage your masterpiece. The practitioner will advise on proper cleaning and moisturizing methods for the treated area, ensuring gentle care and nourishment. Managing mild swelling and redness, which are common and temporary side effects, is also important. The practitioner will guide you on managing these with gentle care.
Finally, avoid rubbing or scratching the treated area to prevent irritation and promote healing. Imagine your masterpiece – would you rub it harshly? Gentle care is vital!
Individual results may vary based on factors like skin type and healing. Consult your doctor before considering SMP if you have any underlying medical conditions.
Explore other hair loss solutions like hair transplants or medications to understand your options and make an informed decision. With careful planning, thorough preparation, and proper aftercare, SMP can be a rewarding journey towards a fuller-looking head of hair and renewed confidence.
Remember, this is not just about aesthetics; it’s about reclaiming a sense of self and empowerment. Embrace the process, be patient with the healing, and enjoy the unfolding transformation.
FAQs on Scalp micropigmentation procedure
● How long is the SMP process?
The SMP process typically takes 3-4 sessions to complete, depending on the extent of hair loss and the desired results.
Each session lasts 2-4 hours, depending on the size of the area being treated. The entire process can take anywhere from 2-6 weeks, with a follow-up session or two scheduled after the initial sessions to make any necessary adjustments.
● What happens after the first SMP session?
After the first SMP session, the treated area will be red and swollen. The practitioner will provide specific instructions on how to care for the area during the healing process, which can take up to 2-4 weeks.
The pigmentation will appear darker initially but fade to a more natural tone in time. The practitioner will schedule a follow-up session to check on the healing process and make any necessary adjustments to the pigmentation.
● Is SMP painful?
The SMP procedure involves needle punctures on the scalp, so some discomfort is expected. However, most practitioners use a numbing cream to reduce pain or discomfort during the procedure.
Some clients report a mild stinging or burning sensation during the procedure, which is usually manageable with the numbing cream. The healing process can be accompanied by some itching and discomfort but should be manageable with the aftercare instructions provided by the practitioner.
Conclusion
In summary, choosing the right practitioner for your scalp micropigmentation procedure is essential to achieve the desired outcome. It is vital to consider the practitioner’s training, experience, use of high-quality equipment and pigments, positive customer reviews and testimonials, and the ability to customize hair loss treatment to individual needs.
Additionally, it is essential to research potential practitioners and schedule a consultation to ensure you are comfortable with their expertise and knowledge.
Are you planning on starting your scalp micropigmentation journey but don’t know the right smp clinic? Click here for a free 5 minute consultation.


